How to Create Rules in the Outlook Web App
How to Create Rules in Outlook
Summary
How to create rules that tell Outlook how to handle emails.
Overview
You can create rules that tell Outlook how to handle email messages. A rule is an action that Outlook Web App runs automatically on incoming or outgoing messages. For example, you can create a rule to automatically move all email sent to a group you are a member of to a specific folder, or to delete all messages with "Dog Toys" in the subject.
You choose the conditions that trigger a rule and the actions that the rule will take. You can choose multiple actions to be taken by a rule, if desired. You can create rules from the settings pane, where you can also delete or modify existing rules.
Steps to Create a Rule
While logged in to your Outlook web app, click the settings icon in the upper right corner of the screen.

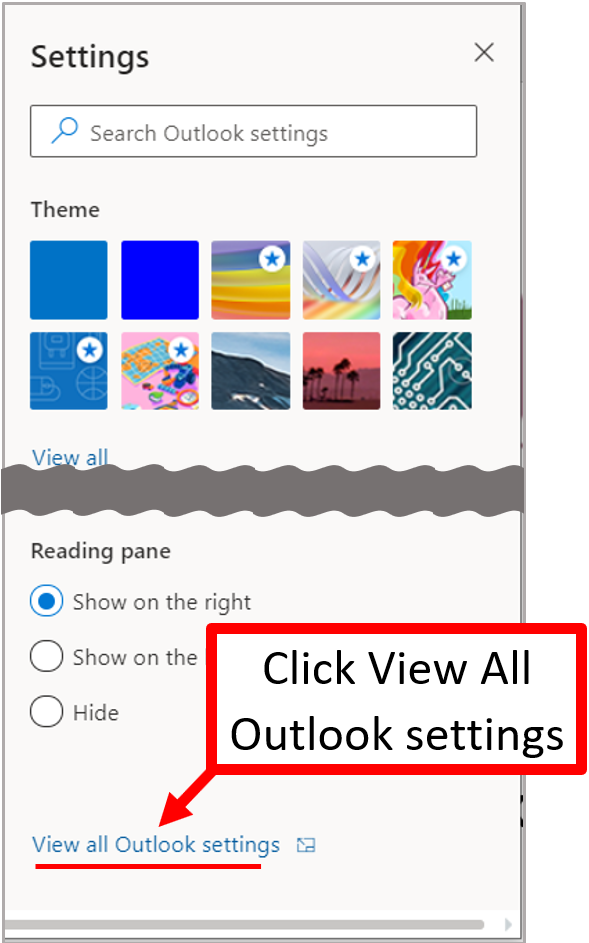
The Settings panel will appear on the right side of the browser window.
Scroll to the bottom of the Settings panel and click View all Outlook settings.
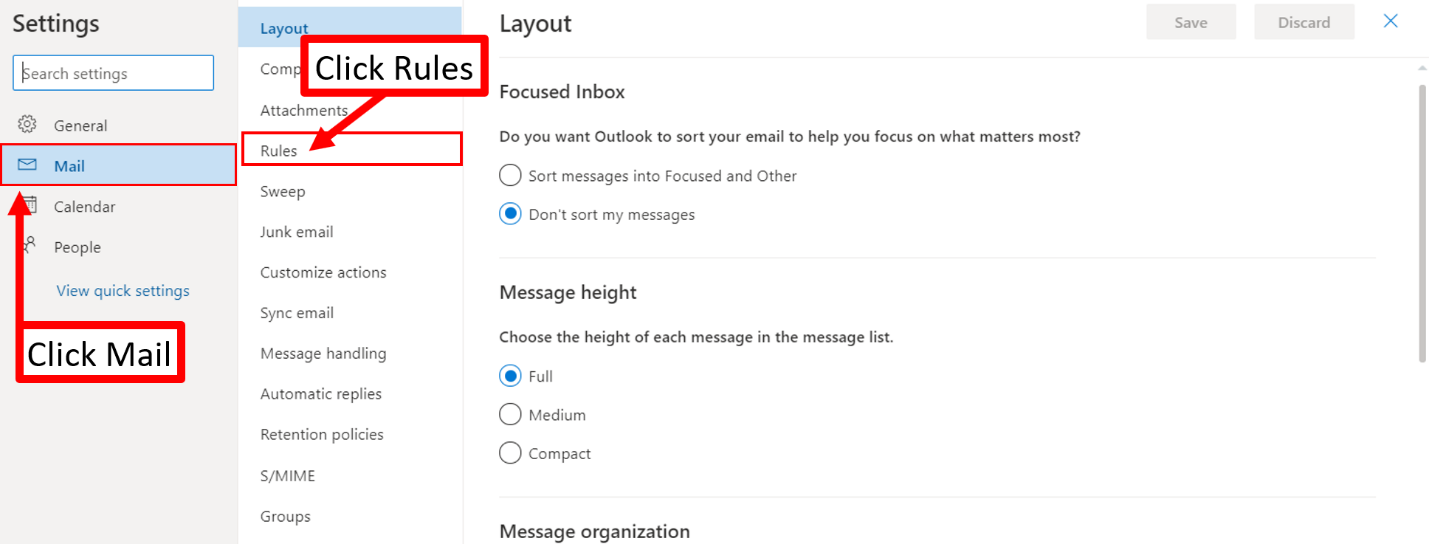
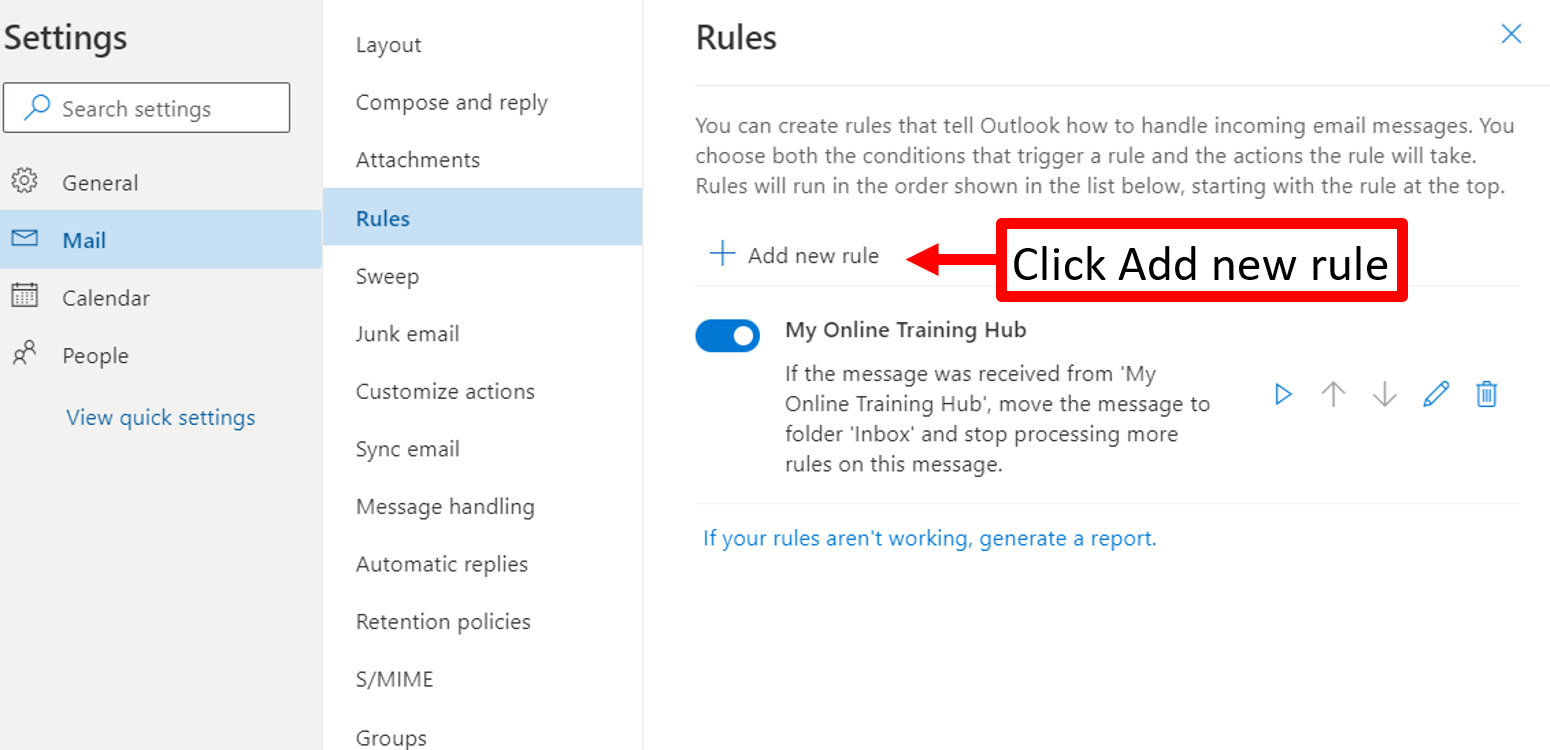
The Settings screen opens. Click Mail in the menu on the left. In the secondary menu to the right, click Rules.
The Rules panel opens.
Click Add new rule.
Rules are stored in a hidden folder in your mailbox. The number of rules you can have per mailbox is limited to 64KB, which is why it is best to keep rule names short. If you run out of space, you have a few options. You can delete unused rules. You can combine rules that perform the same action or you can remove criteria from rules.
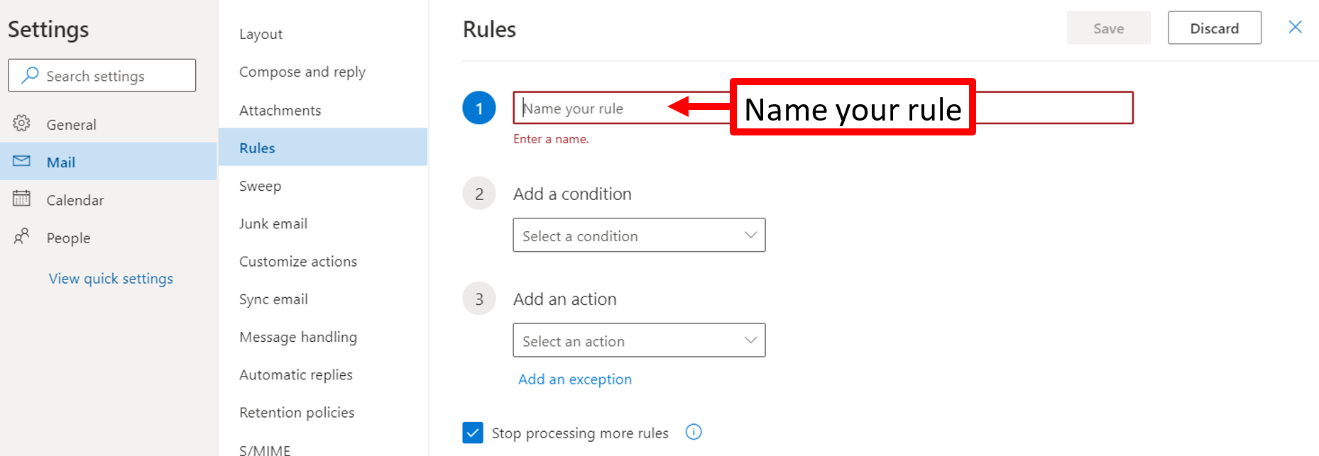
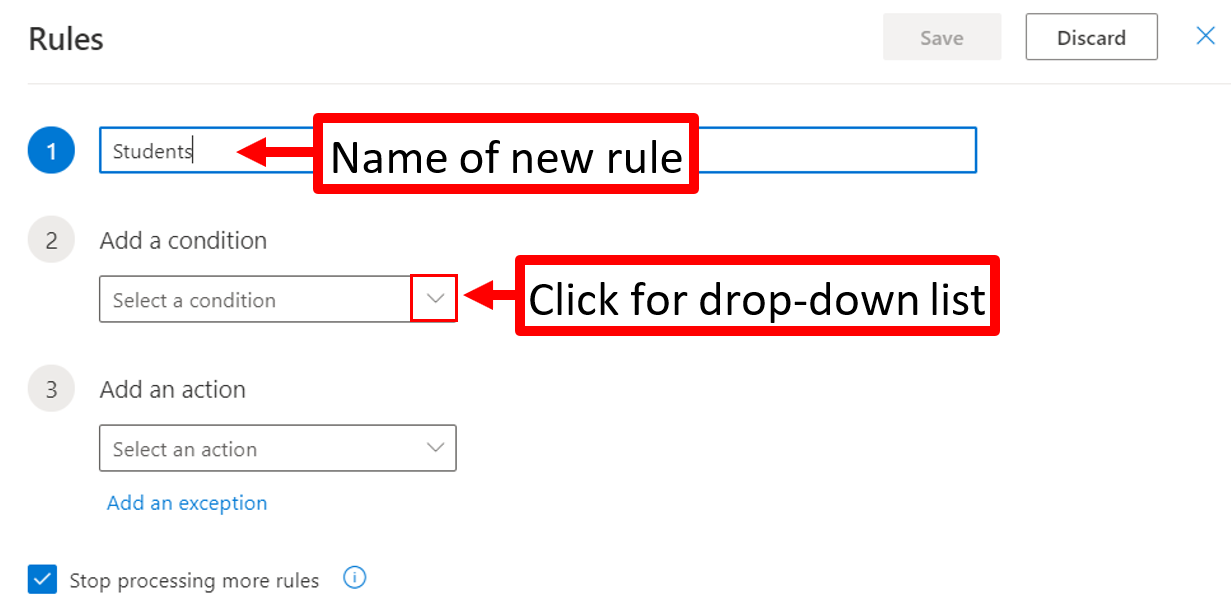
- Enter a name for your new rule
- Click the drop-down list button for a list of conditions that will trigger your new to run.
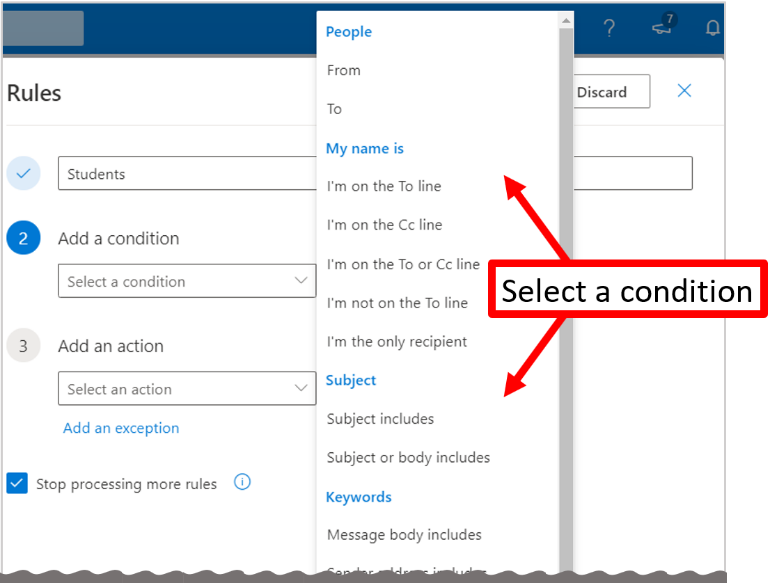
Select a condition from the list.
- Click the drop-down list button to select an action for your rule to perform when the condition is met.
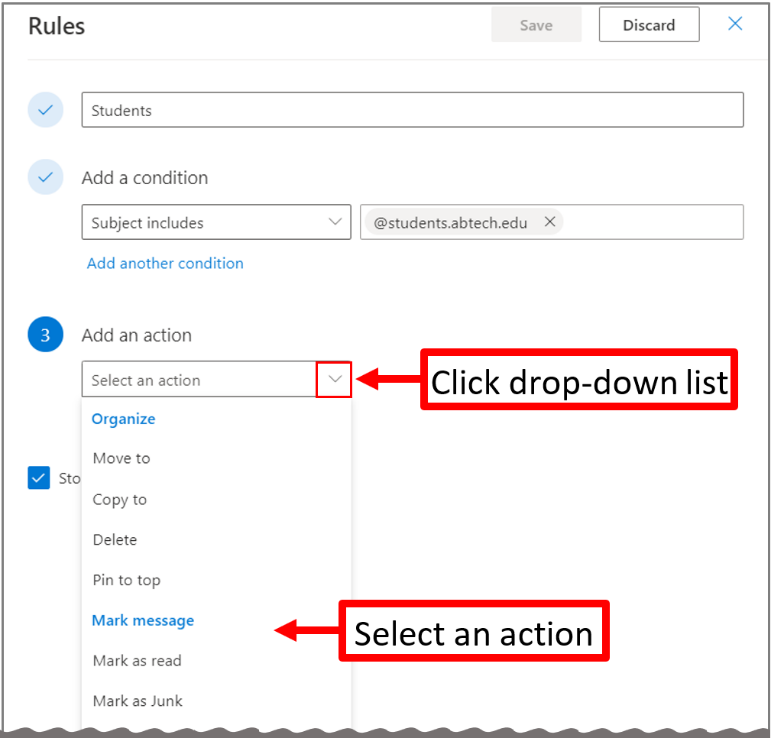
Depending on which action is selected, there may be additional options available.

Click the Add another action link to add additional actions for your rule to perform, if desired.
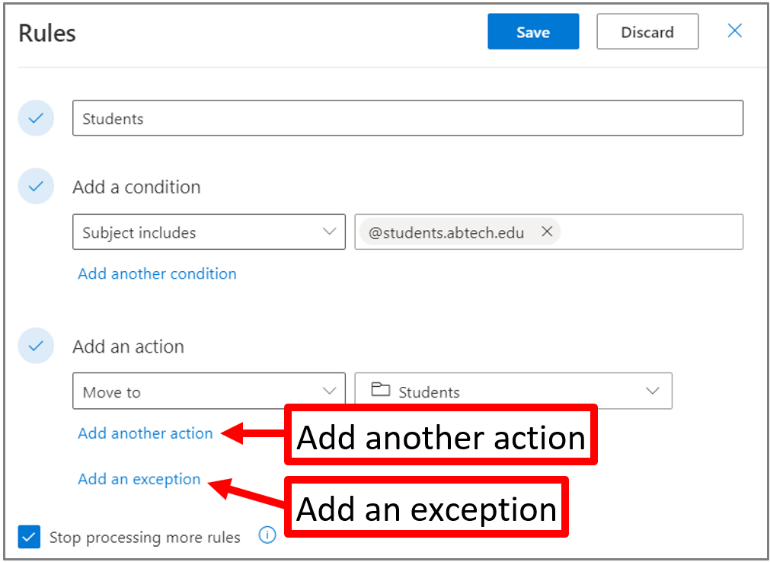
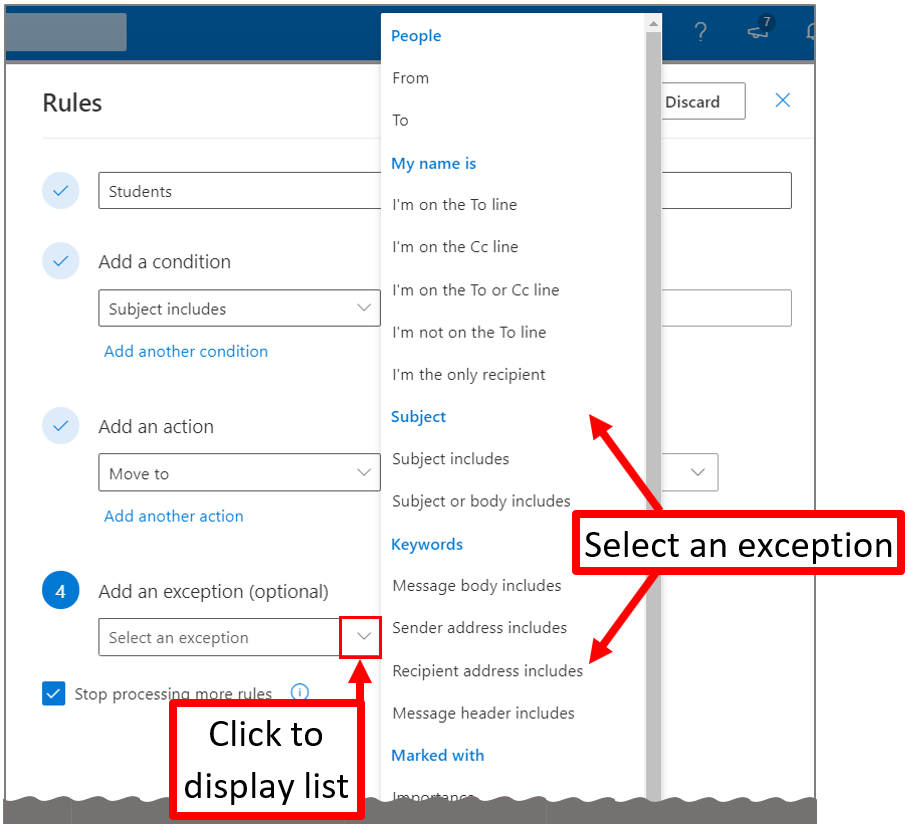
- Click the Add an exception link to create an exception, a condition in which you do not want the rule to perform the action you have chosen.
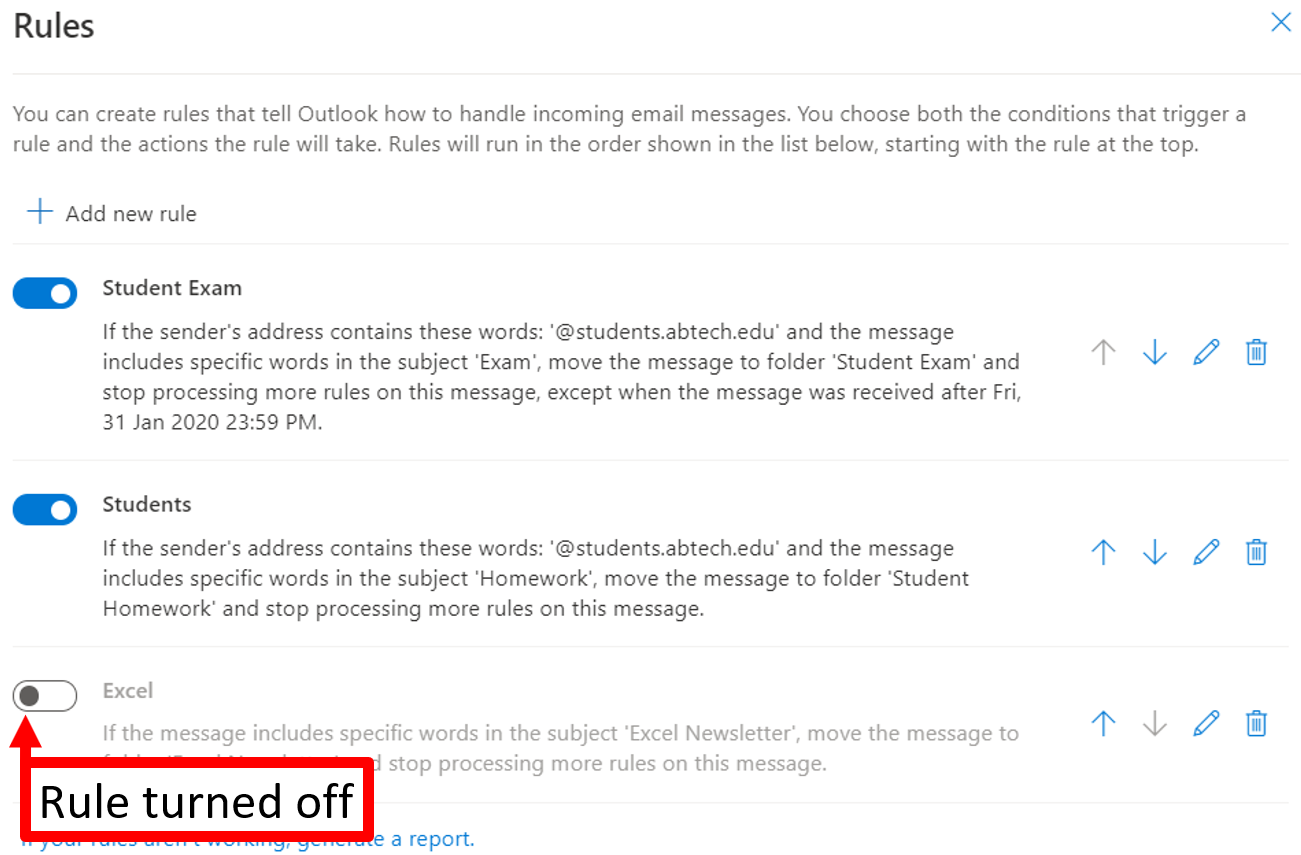
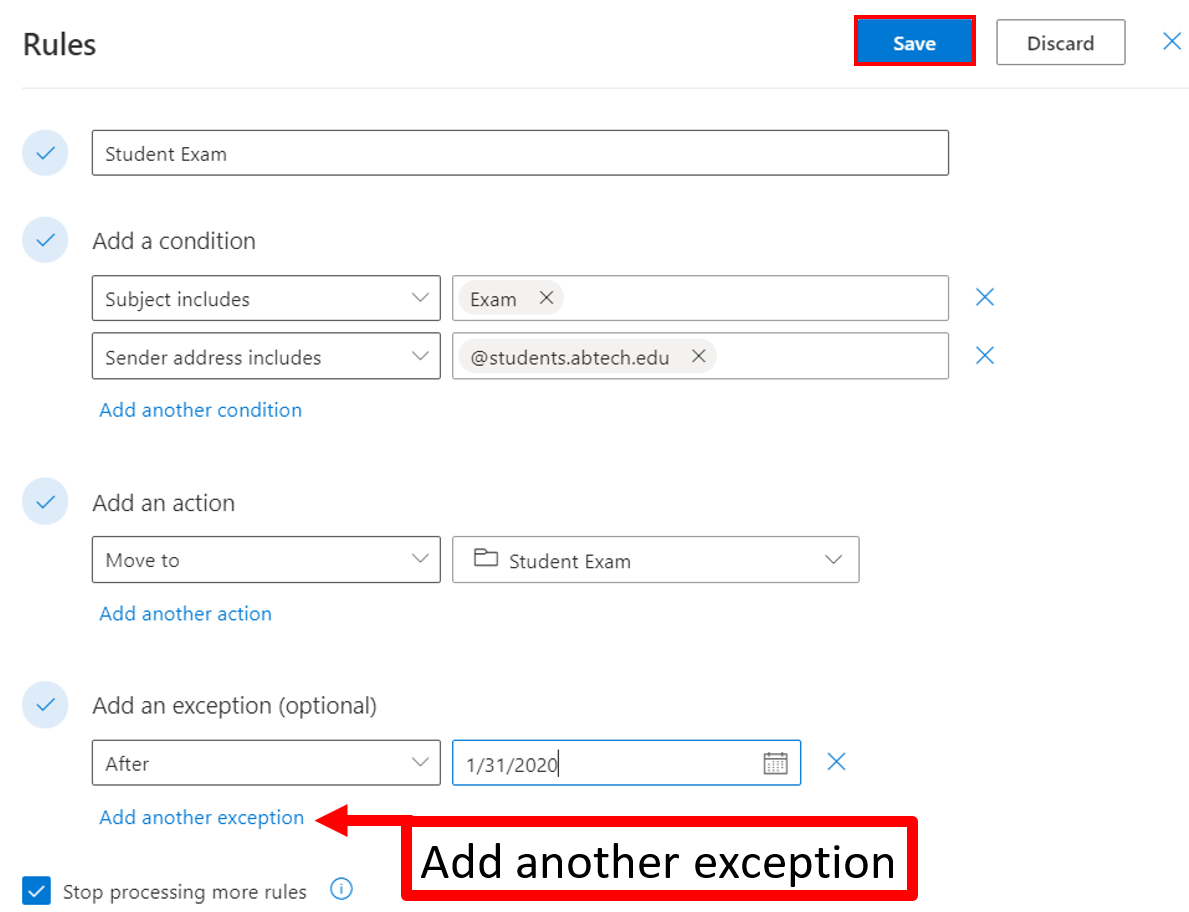
For example, you have a rule that states if you receive an email from @students.abtech.edu in the from address, and the subject is Exam, you want the email to be moved to the Student Exam folder. However, if you want to exclude exams that arrive late, you can create an exception for exams that arrive after the cut off date of January 31, 2020.
Click the Add another exception link to add an additional exception, if desired.
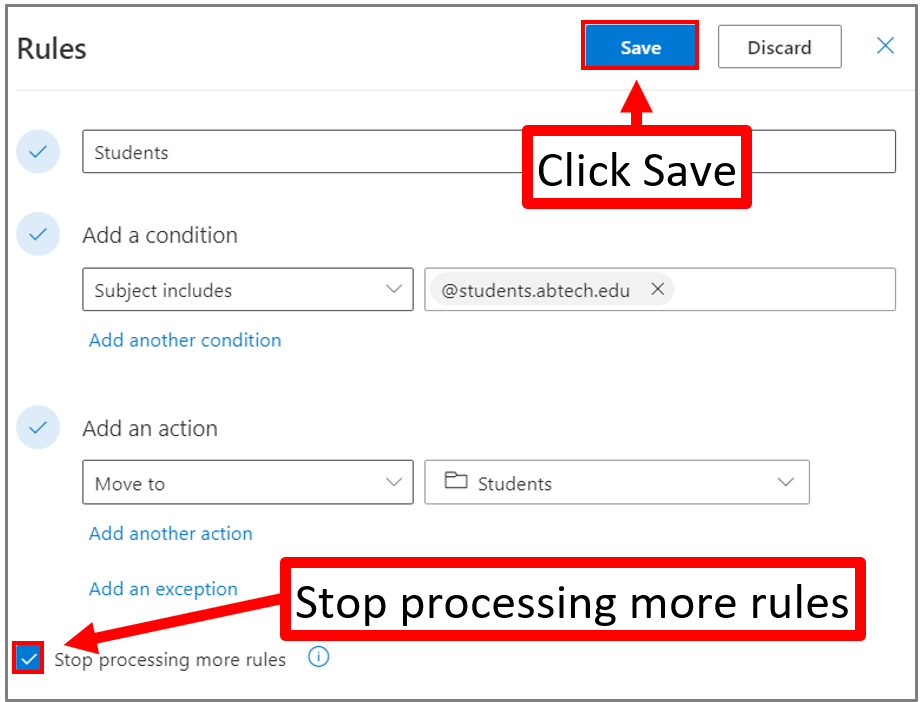
Sometimes, you might set up several rules that could apply to a single message. If you created a rule to move all messages with a subject line of "Homework" to a folder, for example, and then created a second rule to delete all messages with attachments, you probably wouldn't want a Homework email with an attachment to be deleted. If not, you can use the option stop processing more rules on the first rule.
Subsequent rules will be ignored, even if they apply to the message. Without this setting, every rule that applies to the message will run.
-
Click the Save button when finished with setting the conditions, actions and exceptions for your new rule.
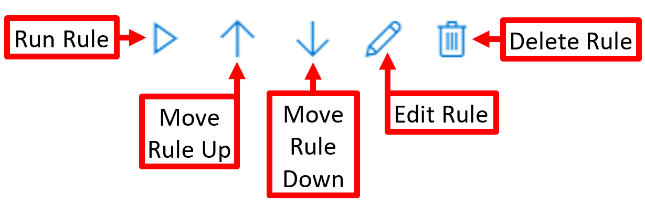
- Rules run in the order they are listed. To change the order in which they run, use the arrow controls to move them up or down in the list.
- Click the pencil to edit the rule
- Click the trash can symbol to delete a rule.
- To turn off a rule (stop it from running, move the on/off switch to the left.