Register for Classes Online
Summary
Follow the steps below to register through Self-Service for curriculum classes for college credit.
A printable one-page instruction sheet is available at Register for Classes – Overview.
Access Self-Service
1. Go to abtech.edu, select "Online Services" at the top of the page, and click "Self-Service."
2. Log in with your A-B Tech Microsoft Account.
3. Click on the "Registration" tile on the Self-Service Main Menu.

Consult Program Advisor
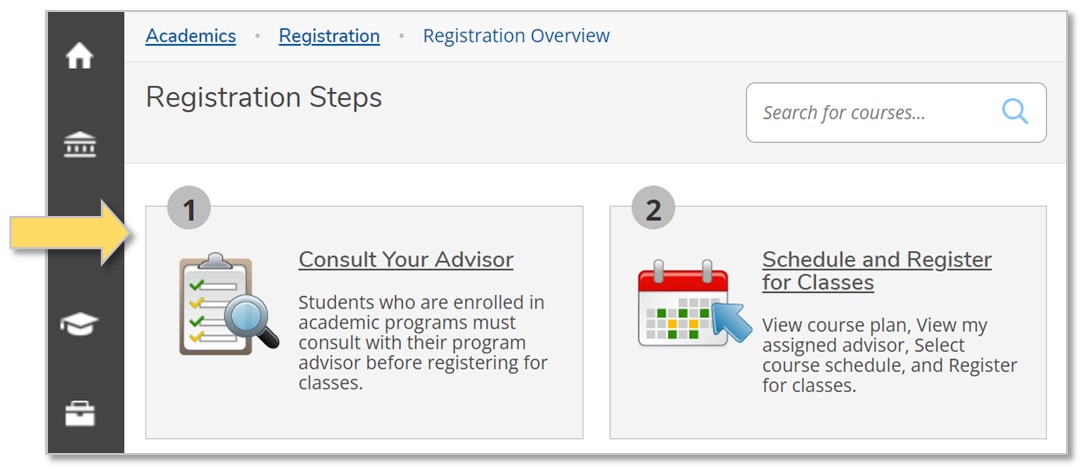
4. If you are enrolled in a program, you must consult with your program advisor for each registration period before you can register. For instructions on how to contact your program advisor, click "Consult Your Advisor" on the left or visit abtech.edu/myadvisor. Students enrolled in programs may only register for courses that their program advisor has Approved.
Build Class Schedule
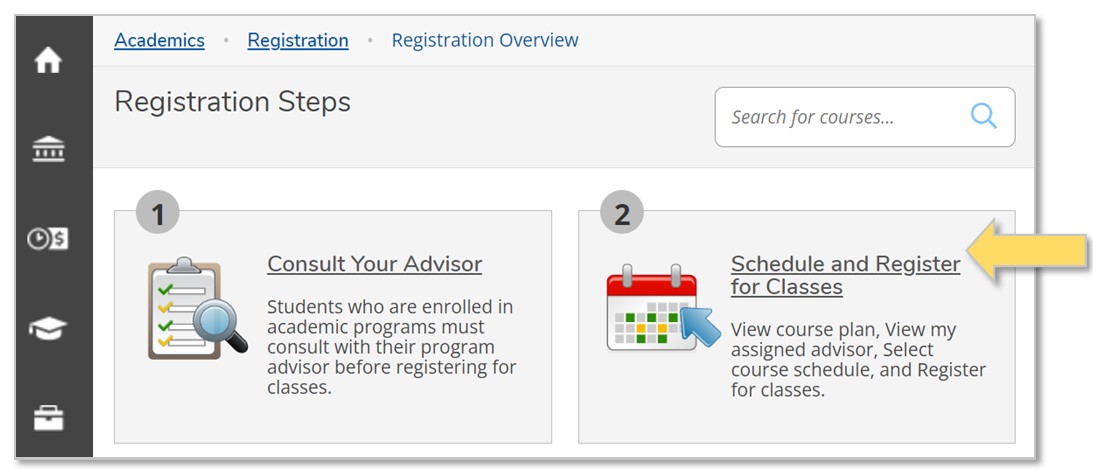
5. Click "Schedule and Register for Classes" on the right.
6. Select the term near the upper left, using the arrows. If you need to add a term, click the plus (“+”) button, select the term with the drop-down arrow, and click “Add Term.”
7. Review courses already added to your course Plan for the upcoming semester. If you don't see any classes down the left side of the page, go to step B. (If you are not in an academic program, you still need to add classes to your course Plan before you can register for them.)
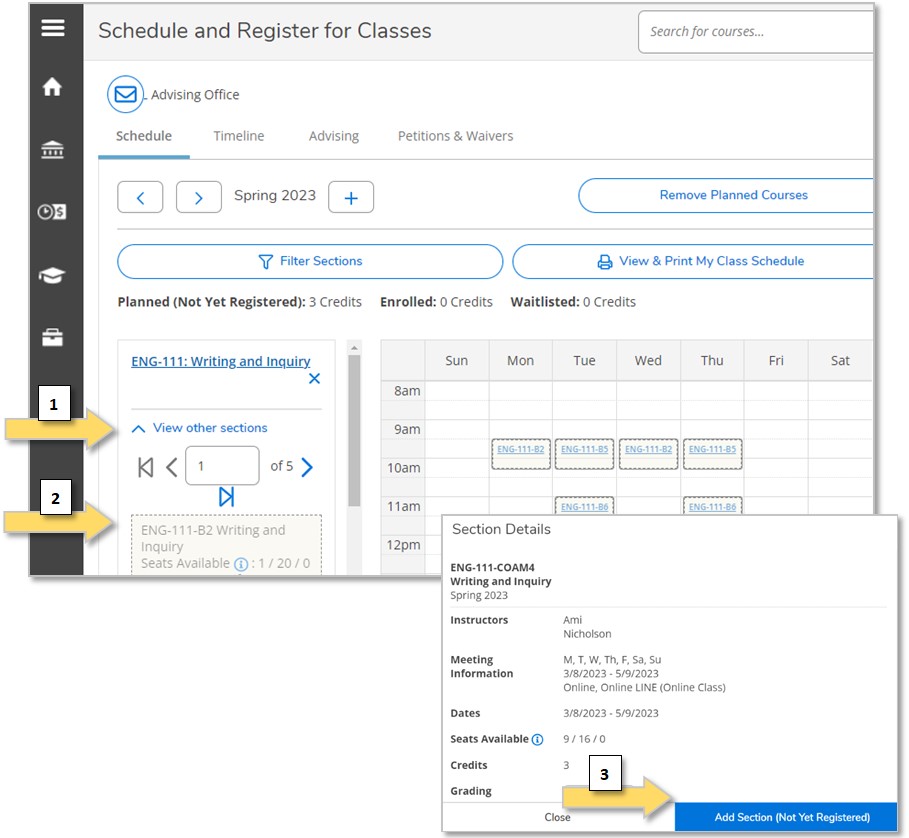
A. To select a section for a course that is on your Plan:
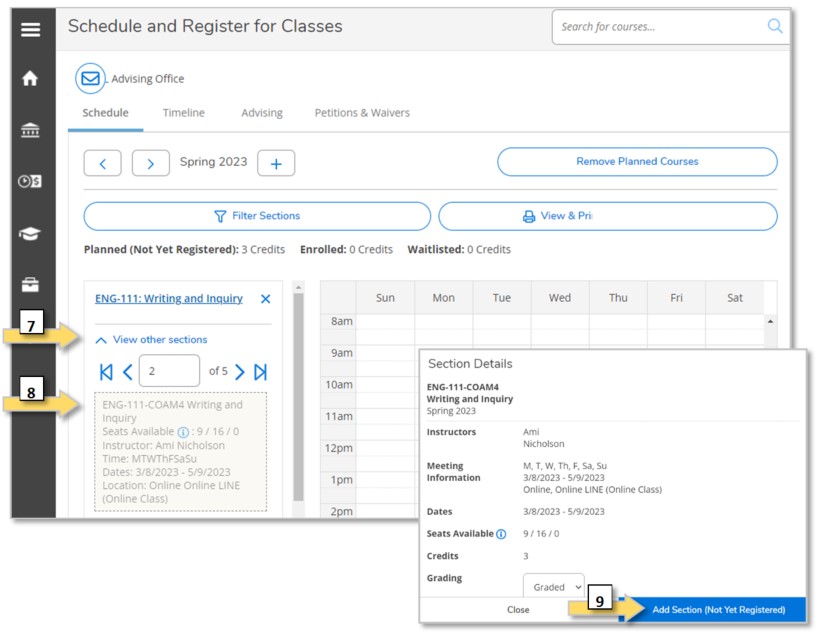
- Click “View other sections” under the course. Available course sections will be listed under the course on the left and on the calendar.
- Select a specific section by clicking on it, either in the list or on the calendar. When the “Section Details” window opens, click “Add Section (Not Yet Registered)” at the bottom. The section will be added to your schedule, but you will not yet be registered. Go to step 8.
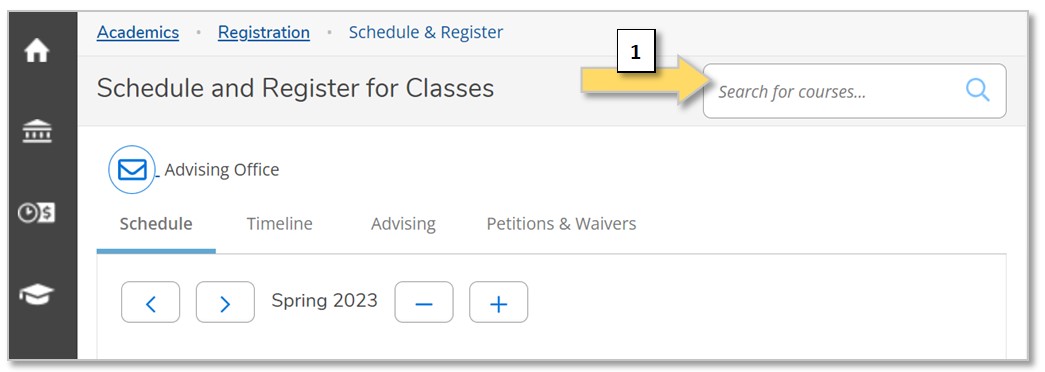
B. To select a section for a course that is NOT already on your plan:
- In the “Search for courses…” bar near the top-right of the page, enter the subject or course number (example: English or ENG-111).
- In the “Filter Results” section on the left, select the term (Fall, Spring, or Summer).
- The course search results will display in a list. Click “Add Course to Plan” at the right of the course name. When the “Course Details” window opens, select the Term you want to register for, then click “Add Course to Plan” at the bottom of the window.
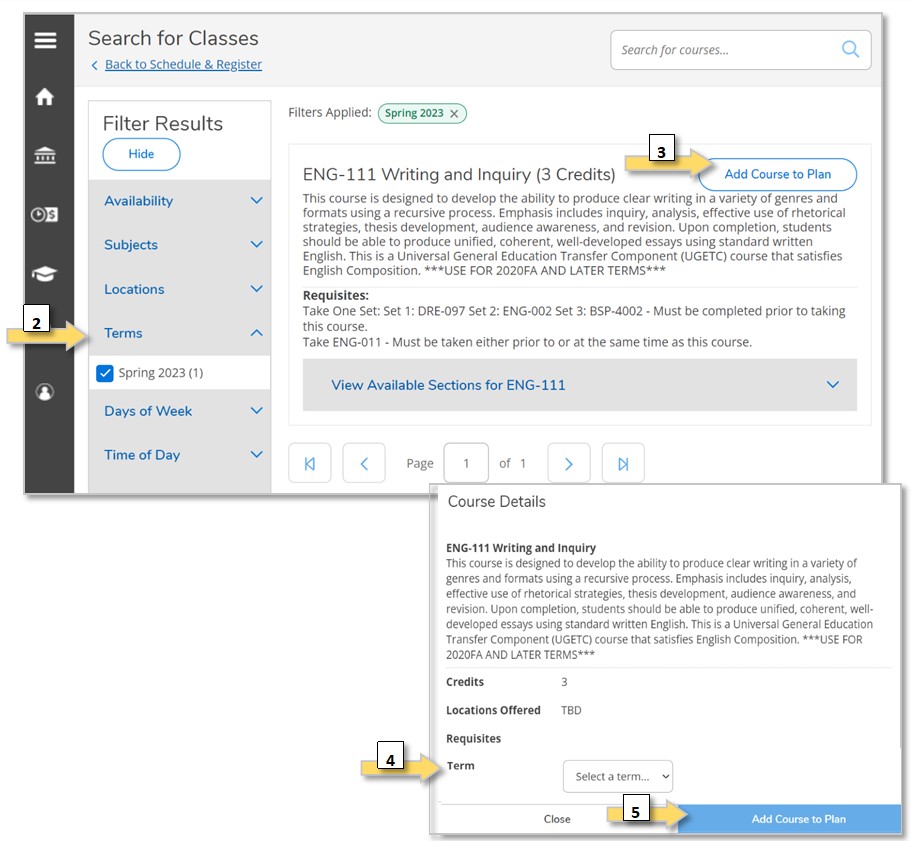
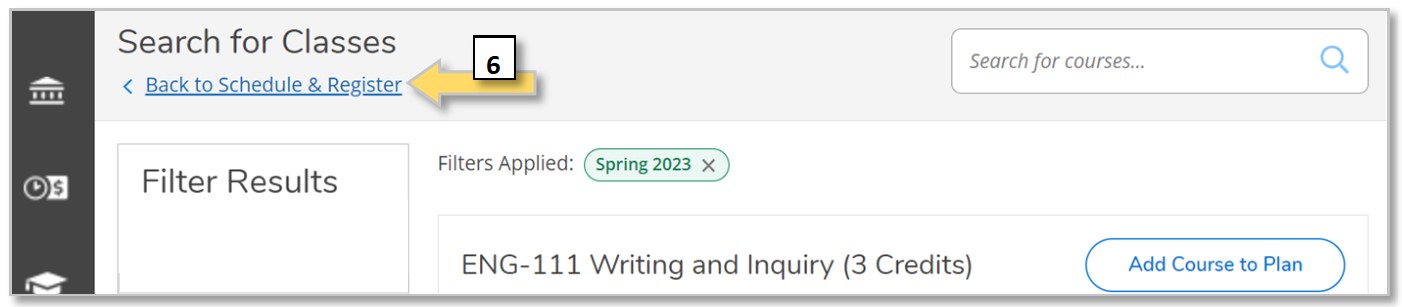
- Return to the registration page by clicking "Back to Schedule & Register" at the top left.
- Any courses you selected will appear down the left side of the page. Click “View other sections” under the course. Available course sections will then be listed under the course on the left or on the calendar.
- Select a specific course section by clicking on it (either in the list on the left or on the calendar). When the “Section Details” window opens, click “Add Section (Not Yet Registered)” at the bottom. The section will be added to your schedule, but you are not yet registered.
Finalize Registration
8. Confirm your registration start date.
9. Click the "Register" button under the course section on the left, or to register for multiple scheduled sections at once, click the "Register Now" Button at the top-right of the page. 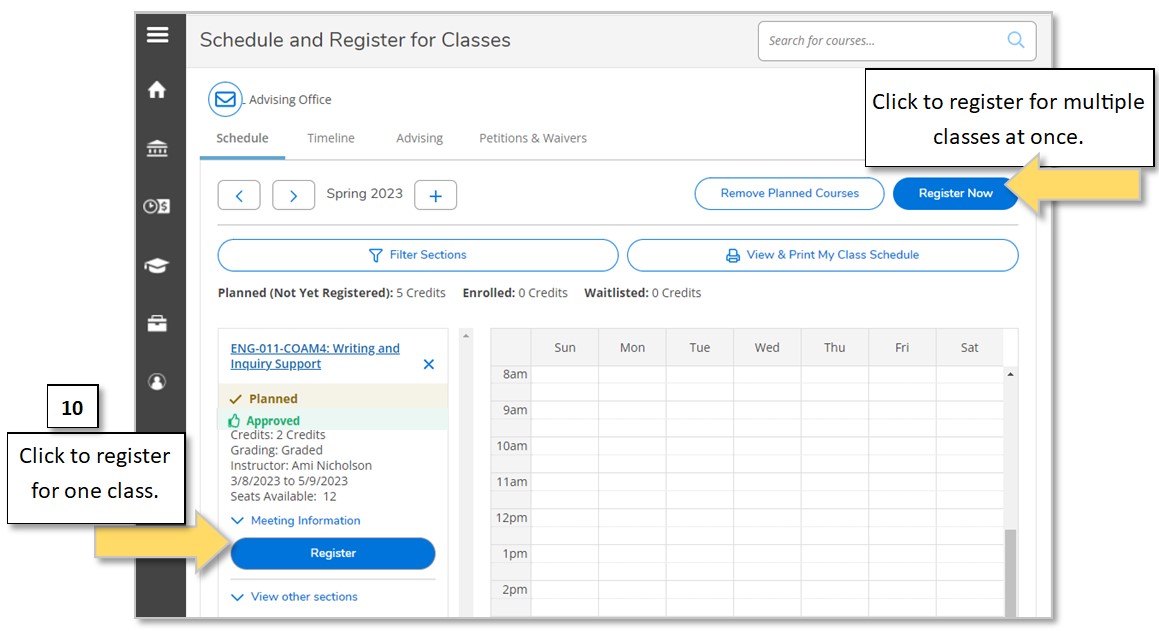
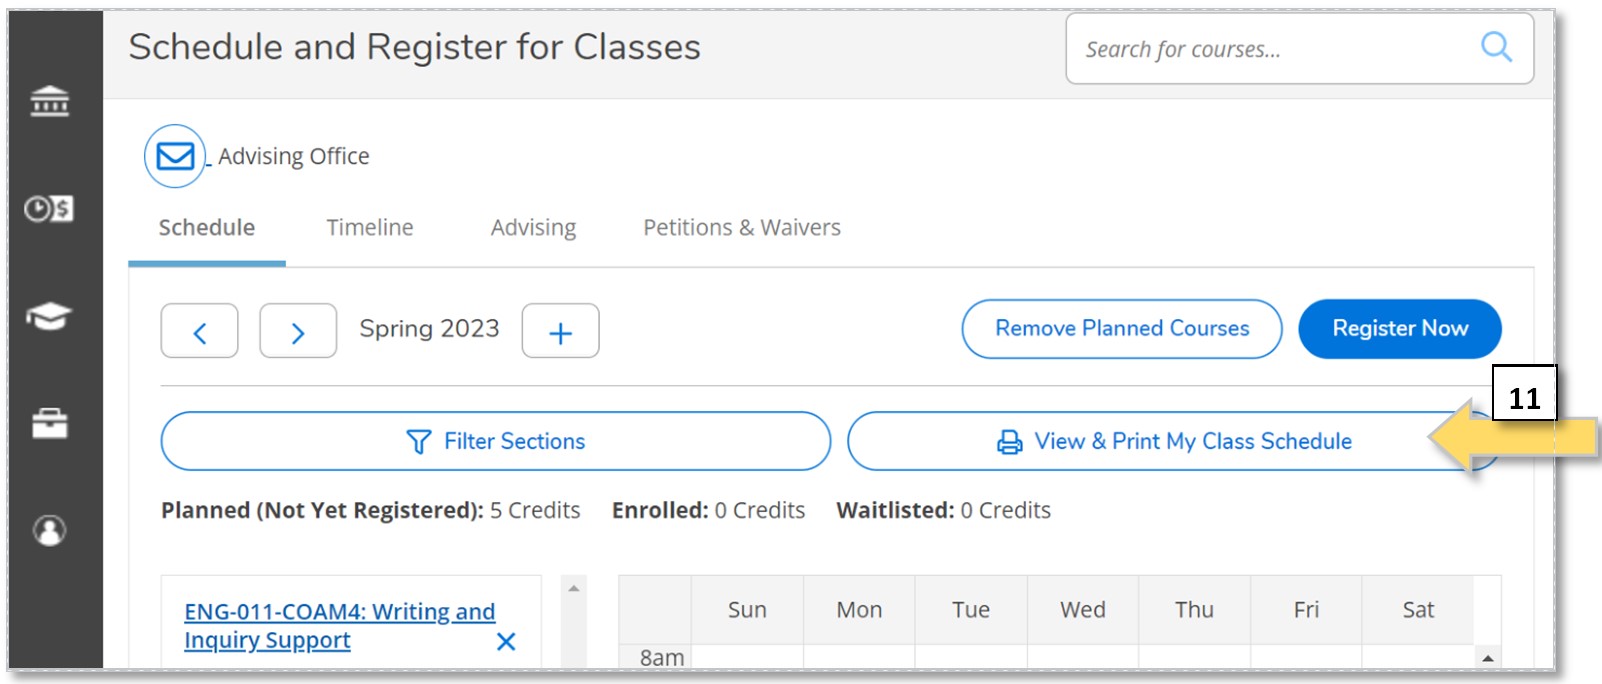
10. Click "View & Print My Class Schedule" near the top-left of the page to confirm your registration.
How to Look Up Class Meeting/Delivery Method Details
Instructions for seeing how specific sections of a course will meet or be conducted are available in our Search for Class Availability article.
Once you are registered for classes, you can find the class meeting/delivery method details in your Class Schedule. See the View Your Class Schedule article.
Terminology
A course section that is synchronous has specific times when everyone meets, either online or in person. For example, there may be a virtual class meeting every Monday and Wednesday at 11:00 a.m.
A course section that is asynchronous does not have specific meeting times. Instead, there are typically specific times when an assignment must be submitted, such as "essay due by Tuesday, April 18 at 5:00 p.m." An asynchronous section may have exams with more specific timeframes.
If you are already registered, you can contact your instructors directly for details about your specific classes. Once a class begins, you can find the details in Moodle.
Need Help?
For help with registering for classes in Self-Service, contact the Information Center at (828) 398-7900 or info@abtech.edu. Be sure to send the email from your student email account.
Virtual Enrollment Lab Appointments are available to provide assistance. Walk-in services are also available in the K. Ray Bailey Student Services Building (#5 on our campus map). No appointment is needed.
Key Words: register, registration, how to register, registered, class, classes, course, courses, registration steps, instructions, search for sections, Self-Service, Self Service, Virtual Enrollment Lab